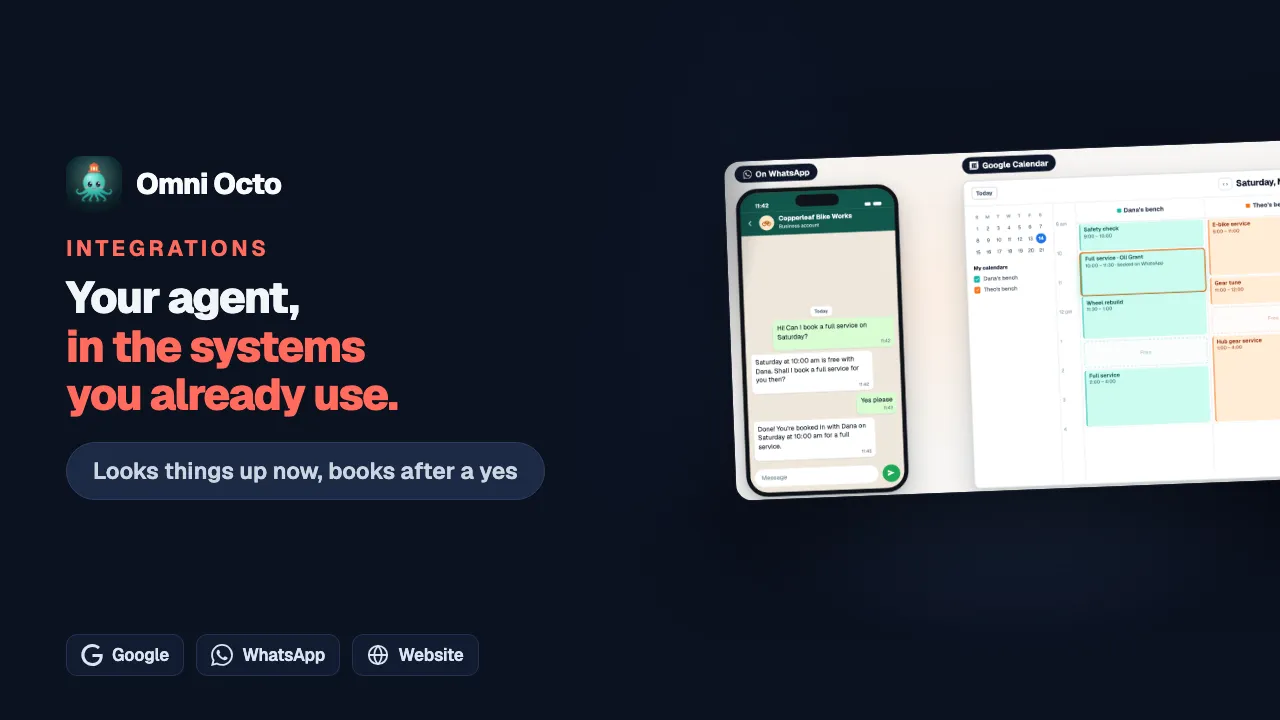
Not every system you use has a card in the app list. If it has an API, or an MCP server, you can still connect it by its address.
Copperleaf Bike Works keeps its repair orders in its own workshop system,
which has an API at https://workshop.copperleaf.example/api/v1. Its service
bookings are in Google Calendar, which has its own card. It also runs a few n8n workflows
for parts orders, published as an MCP server. This guide connects both.
Two ways in
On /integrations, click Add integration. Under Connect anything are two cards:
| Card | What it says | Use it for |
|---|---|---|
| Any MCP server | ”Your own server, or an app not listed.” | A server that already describes its own tools: Zapier, Make, n8n, or an app’s MCP server |
| An API by its address | ”Your booking, records or order system.” | An ordinary web API. You then build its tools yourself |
For Zapier specifically, there is a guided path: see connect through Zapier.
Connect an API
Click An API by its address. The form is titled Connect an API:
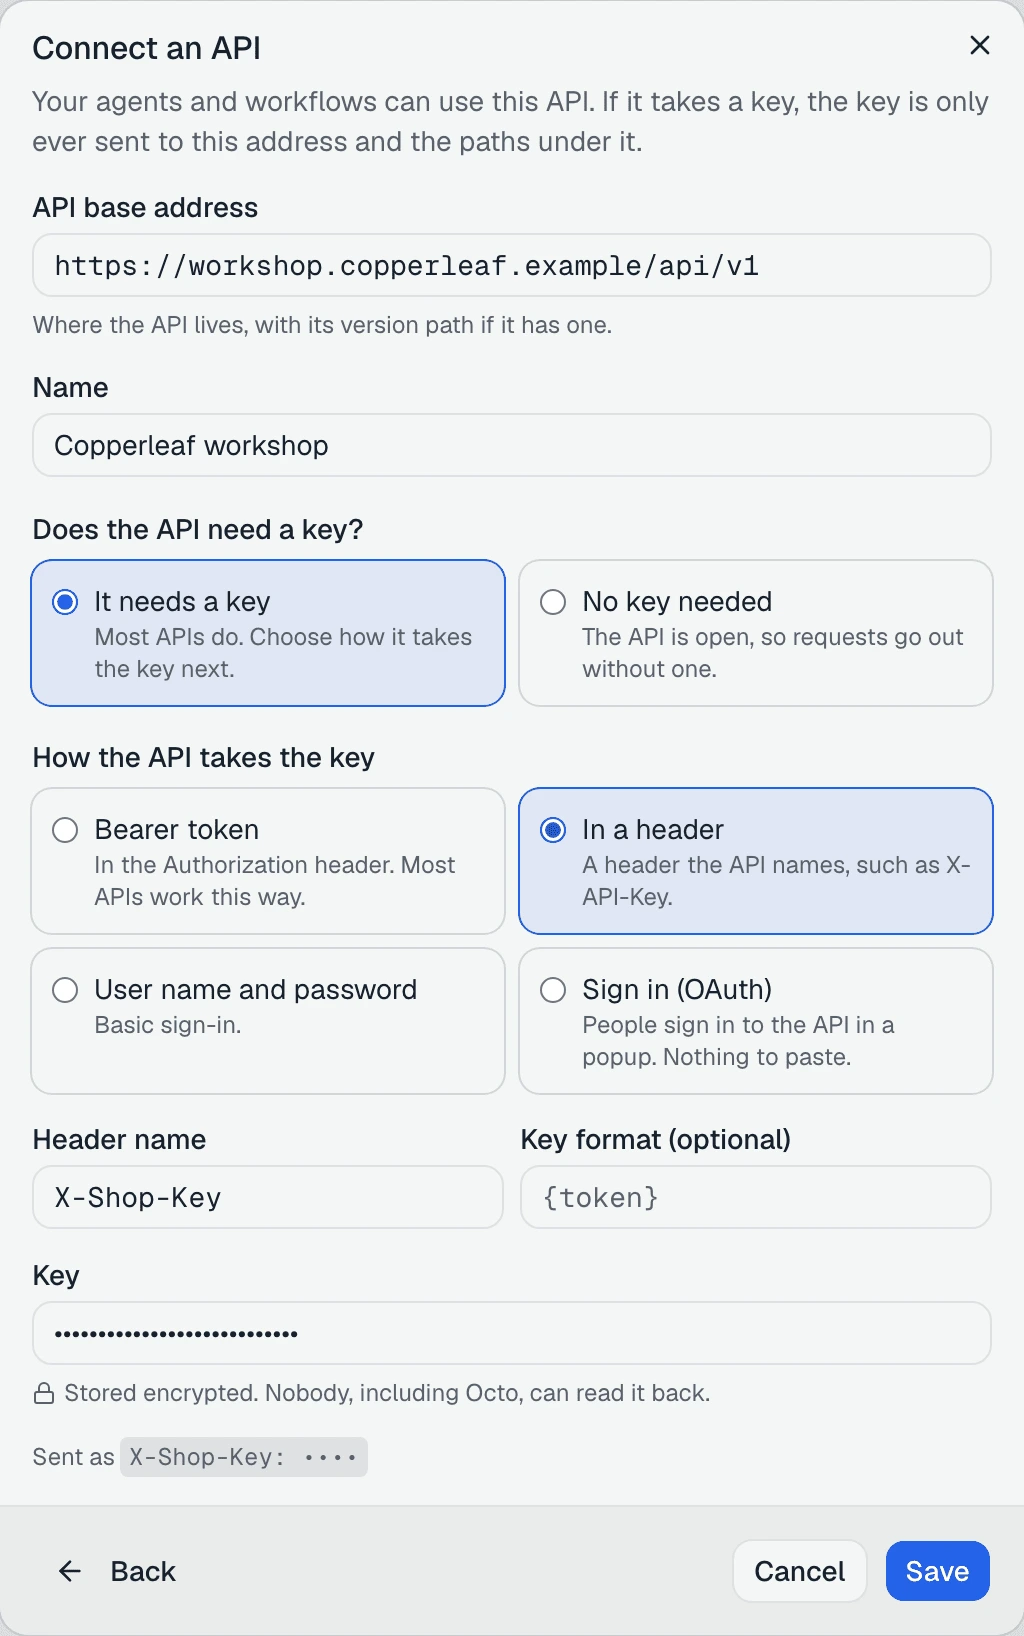
“Your agents and workflows can use this API. If it takes a key, the key is only ever sent to this address and the paths under it.”
Fill it in from top to bottom:
- API base address: “Where the API lives, with its version path if it has
one.” Copperleaf pastes
https://workshop.copperleaf.example/api/v1. An address that is not public, or nothttps://, is refused: “Use a public https:// address, like https://api.example.com/v1, with no query or user name.” - Name: what the integration is called everywhere else. Leave it empty and it takes the host name: “Leave it empty to call it workshop.copperleaf.example.” Copperleaf types Copperleaf workshop.
- Does the API need a key? Choose It needs a key (“Most APIs do. Choose how it takes the key next.”) or No key needed (“The API is open, so requests go out without one.”).
How the API takes the key
With It needs a key, choose under How the API takes the key:
| Choice | What it means | What you enter |
|---|---|---|
| Bearer token | ”In the Authorization header. Most APIs work this way.” | Key |
| In a header | ”A header the API names, such as X-API-Key.” | Header name, Key, and optionally Key format (optional) |
| User name and password | ”Basic sign-in.” | User name and Password |
| Sign in (OAuth) | “People sign in to the API in a popup. Nothing to paste.” | The sign-in settings below |
Under the key, Sent as shows exactly how the key will travel, with the key itself hidden. A header the platform sets itself is refused: “The platform sets this header itself. Use the header the API names for its key.”
The key is “Stored encrypted. Nobody, including Octo, can read it back.”
Click Save. You see “Copperleaf workshop saved.” and the integration opens on its Tools tab, ready for its first tool. If the address did not answer yet, it is saved anyway, with a note: “Nothing answered at https://workshop.copperleaf.example/api/v1 yet. Check the address if requests fail.”
APIs that sign in with OAuth
Sign in (OAuth) asks for the API’s sign-in settings:
- Fill in from the sign-in server: paste the sign-in server’s address and click Look up. It finds the Sign-in page address and the Token address for you. If it can’t, Enter the addresses yourself.
- Permissions to ask for: “Your API’s documentation lists these, often called scopes.”
- App ID and App secret: from the app you registered with the API. “Leave empty if your app has no secret.”
- Address to add to your app’s allowed redirect addresses, with Copy. Paste it into the app’s settings on the API’s side.
Under Advanced (OAuth), Server to server (no one signs in) is for APIs where “The app gets its own token. No person signs in.”
After Save, the dialog says “Copperleaf workshop is saved” and “Now sign in to connect an account. Agents, workflows and Octo use it.” Click Sign in and finish in the popup.
Next: tools
A new API has no tools. On its Tools tab, New tool builds one. How is in make your own tool and check it.
Where requests may go
An API integration’s key never goes anywhere you have not named. Open the integration’s Settings tab.
Base address is the address you connected:
“Requests and the key go only to this address and the paths under it.”
You can change it here and Save: “Base address saved.” A tool’s path is always added after this address, and a path that tries to leave it is refused when you save the tool: “The path leaves the integration’s approved address.”
On an API that takes a key, Approved addresses is for the rare API that sends you somewhere else:
“Requests already go to the base address. Approve other addresses here only if the API sends you to them, such as a separate file host.”
Type the address in Address to approve, click Add, then Save: “Approved addresses saved.” An address is the host only: “Use https:// and a host name only, like https://api.example.com. No path, no IP address.” You can approve up to 50.
A request to any other address is stopped before it leaves. Redirects are not followed. On the integration’s Activity tab such a call says “Blocked: address not allowed”.
On a phone these settings are read-only: “You can see the approved addresses here. Open this page on a larger screen to change them.”
Connect an MCP server
Click Any MCP server. The panel is titled Connect an MCP server:
“Zapier, Make, n8n or any app’s MCP server. We list its tools before anything is saved.”
- Server address: paste it. The panel tells you where to copy it from:
- “In Make: copy your MCP server address, the one with your MCP token.”
- “In n8n: copy the Production URL of your MCP Server Trigger.”
- Name: empty, it is named after the server: “Leave it empty to call it n8n.” Copperleaf types Copperleaf parts.
- Sign-in: how the server checks it is you.
Some addresses carry their own key. When we spot one, the field says “This address contains a private key. We’ll store that part encrypted.”, and Sign-in says “This address already contains its key, so it takes no other sign-in.” If your address holds a key we did not spot, open Advanced and tick Treat the whole address as private.
Sign-in
| Choice | What it means |
|---|---|
| None | ”The address is all the server needs.” |
| Token | ”Sent as a Bearer token.” Paste it in Token |
| Header | ”A header the server names, such as X-API-Key.” Enter Header name and Header value |
| Sign in with an account | ”You’ll sign in on the server’s own page.” |
With Sign in with an account, the button reads Sign in with Copperleaf parts and opens the server’s sign-in page in a popup. Some servers do not register apps for others. Then the panel asks you to create one there, add the address it shows to that app’s allowed redirect addresses, and enter its App ID.
Connect
Click Connect. The panel lists the server’s tools before anything is saved: “Contacting server… Stops after 15 s.”
| What it says | What to do |
|---|---|
| ”We couldn’t reach the server.” | Check the address, and that the server is running |
| ”Nothing answered at this address. Check you copied it; for an n8n workflow, turn it on (Active) first.” | Turn the n8n workflow on, then connect again |
| ”The server didn’t accept the token.” | Copy the token again |
| ”This server asks you to sign in. Choose Sign in with an account.” | Change Sign-in |
| ”This server uses an older connection type we don’t support.” | This server can’t be connected as it is |
| ”The server has no tools yet. Add tools to it where you manage the server, then check again.” | It is connected. Add tools on the server, then Check again |
If the server is already connected, the panel names the keys it already has and offers Open Copperleaf parts or Add as another key. More than one key on one integration is covered in manage keys, accounts, and turning integrations off.
Choose the server’s tools
Once connected, the same panel moves on to Choose tools: “Tick the tools from Copperleaf parts that your agents may use.” Only ticked tools are saved, and only saved tools can be given to an agent.
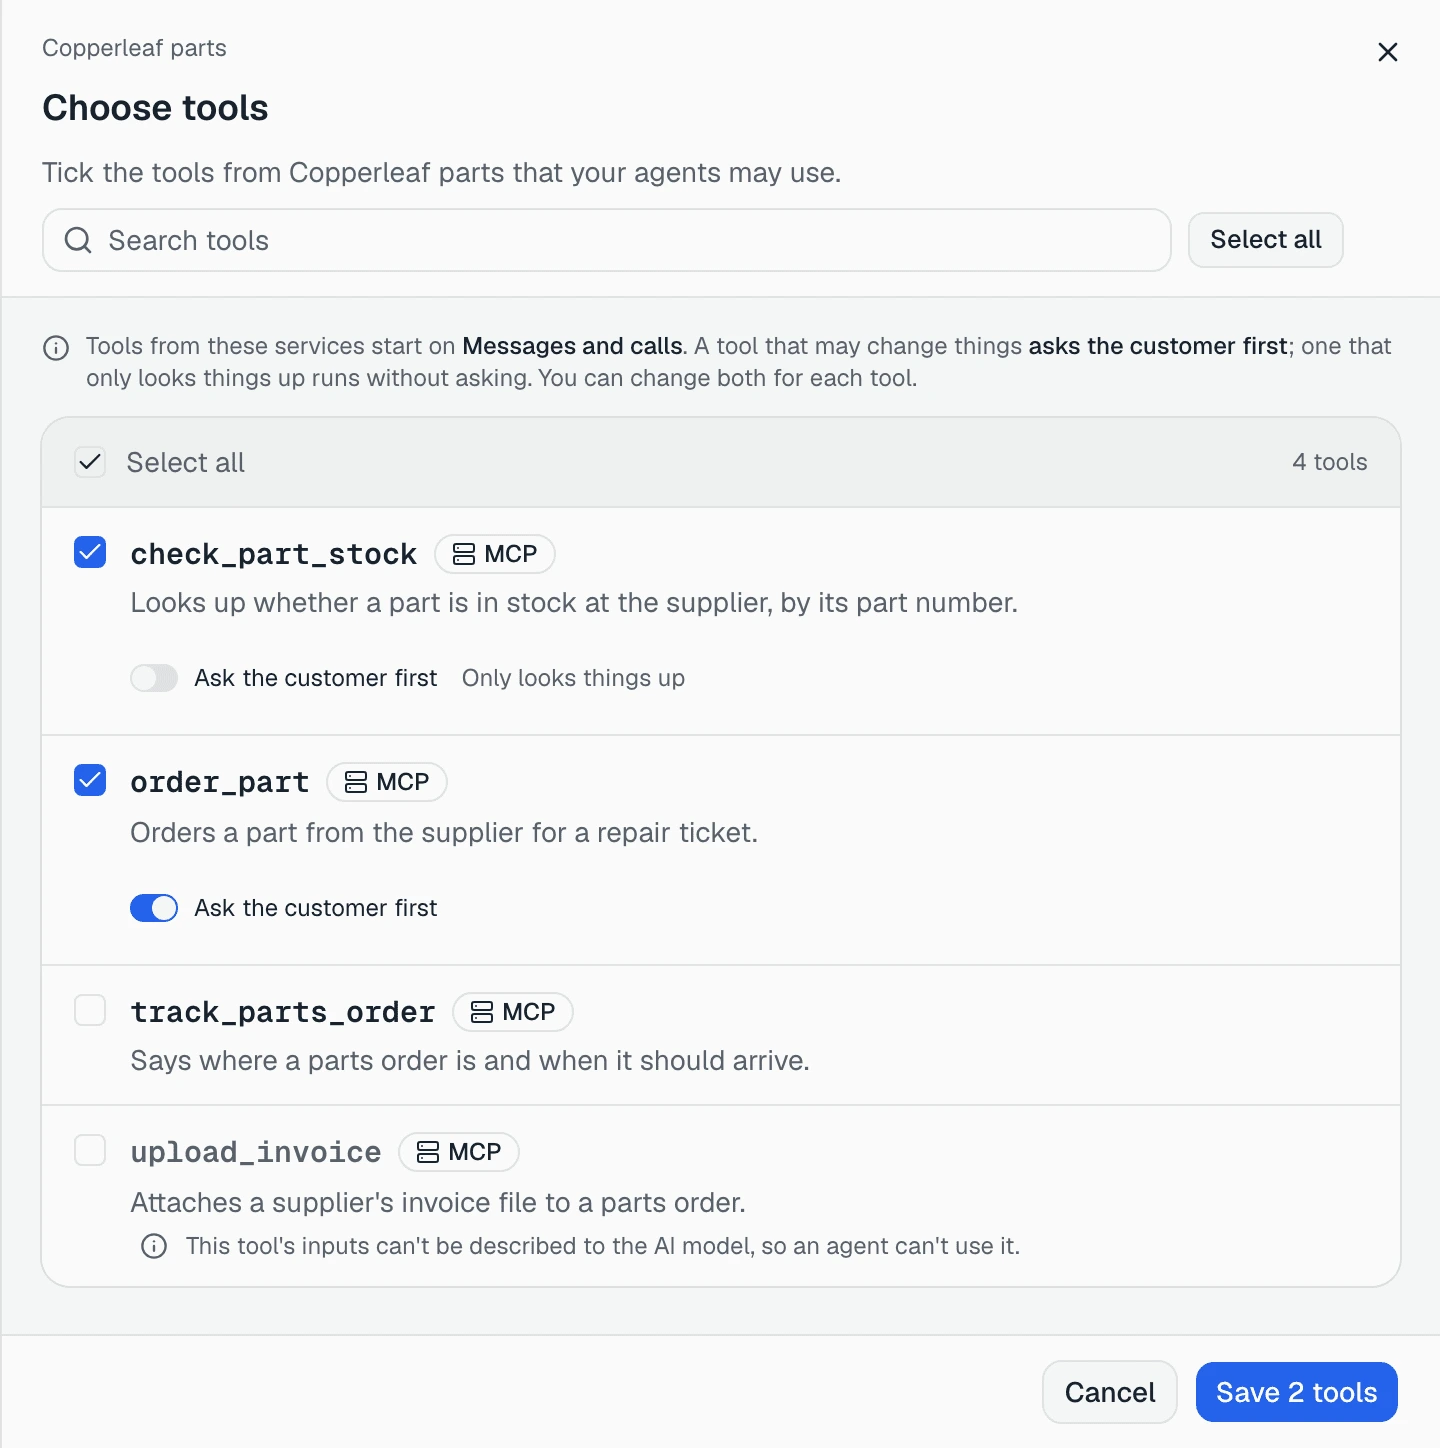
One line explains how each ticked tool starts:
“Tools from these services start on Messages and calls. A tool that may change things asks the customer first; one that only looks things up runs without asking. You can change both for each tool.”
A ticked tool shows Ask the customer first, on by default. A tool the server marks as read-only says Only looks things up instead. Untick Ask the customer first and you are warned: “This tool may change things in Copperleaf parts. The agent will run it without asking the customer.”
Some tools can’t be ticked, and say why, for example “This tool’s inputs can’t be described to the AI model, so an agent can’t use it.”
Click Save 2 tools. “2 tools added. Add them to an agent on its Integrations tab.” The integration opens on its Overview.
To add or remove tools later, open the Tools tab and click Choose tools. Unticking a tool that agents use asks first, and takes it off those agents.
Fill in a tool’s inputs yourself
The server decides each tool’s inputs. Open a tool from the Tools tab to see them under What the agent needs to ask for. For each input, Fill in automatically offers The agent asks for it, A value (the same for every agent) or An agent value (each agent sets its own). An input you fill in is one the agent stops asking the customer for.
When tools change on the server
The server can change a tool after you chose it. We read the server’s tool list again regularly. A tool whose description or inputs changed is paused on every agent, and its card says Paused: changed on the server with Review change. A tool that is gone from the server is turned off.
To read the list right away, open the integration’s ⋯ menu and click Refresh tools: “List the server’s tools now. A changed tool pauses until you review it.”
Reviewing, approving or keeping a tool paused is covered in when an integration needs you.
Moving the server
If the server moves, open Settings, Server address, Change address:
“If it’s a different server, the old server’s keys stop working and every tool needs checking again.”
Next
Give the new tools to an agent on the agent’s Integrations tab: give an agent tools from your other systems.